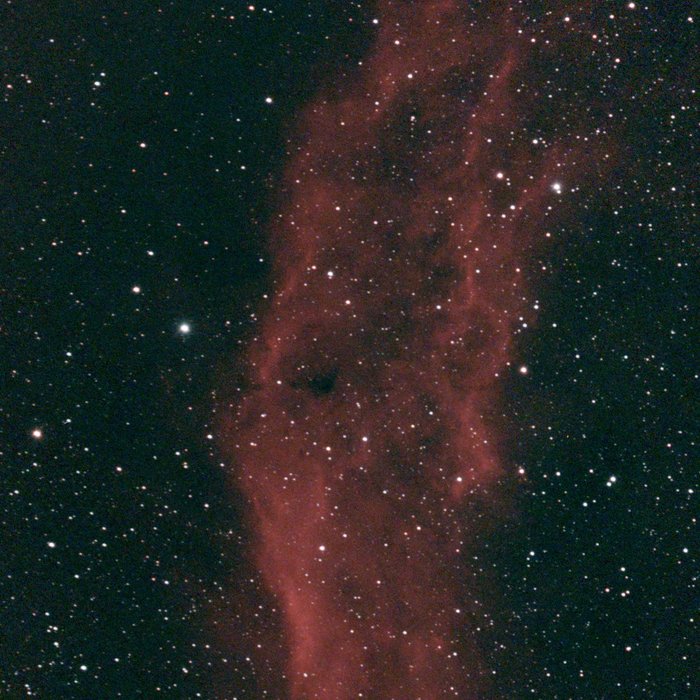
The first time I stacked a few dozen subs of a faint target and the result still looked grainy, I figured I'd done something wrong. Bad polar alignment, bad focus, bad something. Turns out that's just... deep-sky imaging. Faint targets mean low signal, low signal means the noise floor shows up loud and clear, and no amount of "just take more exposures" fully makes it disappear on its own. What actually cleans it up is a de-noising pass — and these days, that pass is AI-powered. I want to walk through how noise gets into your images in the first place, what to do about it before you touch any software, and then the exact AI de-noising workflow I run on my own shots.
Why Deep-Sky Shots Get Noisy in the First Place
Noise isn't a bug in your gear, it's just physics. A few things stack on top of each other.
Shot noise is the big one. Faint deep-sky targets deliver very few photons per pixel, and the randomness in that trickle of light shows up as grain. The fainter the target, the worse it is, and it's unavoidable — more total exposure time is the only real fix at the capture stage.
Sensor/read noise comes from the camera electronics adding a small amount of noise every time it reads out a frame. Smart telescopes stack dozens to hundreds of subs specifically to average this down.
Thermal noise comes from warm sensors generating stray electrons that mimic signal. It's worse in summer and on longer exposures, which is part of why smart scopes like the Seestar keep session lengths and gain settings tuned the way they do.
Light pollution and sky glow mean a brighter background sky fighting a higher noise floor before you even get to your target. If you've read my post on what you can actually see from a Bortle 7 backyard versus a Bortle 2 dark site, this is the same problem showing up again in the noise, not just in what's visible to the eye.
Stacking already knocks a lot of this down — that's the whole point of stacking 30, 60, 100+ subs instead of shooting one long exposure. But stacking reduces noise, it doesn't erase it, especially on faint or low-surface-brightness targets. That's where de-noising software comes in.
The Old-School Fixes (Still Worth Doing First)
Before you touch any AI tool, a few capture-side habits make the de-noising step way easier and keep you from over-processing a noisy image into a smeared one.
Shoot more subs, not just longer ones. More, shorter exposures stacked together generally beats fewer long ones for noise, and it's more forgiving of tracking error.
Let your stacking app build or use dark frames and hot pixel maps if your scope's software supports it — this knocks out fixed-pattern noise before AI ever sees the image.
Don't stretch the image too aggressively before de-noising. A hard stretch amplifies noise right along with faint signal. De-noise on a gentler stretch, then finish stretching after.
Dither between subs if your capture software allows it — it turns fixed-pattern noise into random noise, which stacking is much better at averaging out.
None of this replaces a de-noising pass on a genuinely faint target, but it means the AI step is cleaning up real leftover noise instead of compensating for a rushed capture.
📸 My AI De-Noising Workflow (AstroWizard, Step by Step)
This part's firsthand — this is the exact tool I reach for. I run my stacked files through AstroWizard, a free guided processing app (Windows/macOS/Linux) that walks you through the whole post-processing chain in order: load, crop, gradient removal, color calibration, sharpen, de-noise, stretch, "beautify," export. The de-noise step is built on GraXpert's AI de-noising engine under the hood, so you're getting a proper trained model doing the work, not just a blur filter with a fancy name.
What I actually do: 1. Load my stacked FITS file — or the stacked TIFF if I processed in Siril first (see my post on editing FITS files in Siril if you haven't stacked yet). 2. Run gradient removal and color calibration first. De-noising a file that still has a light-pollution gradient baked in just smooths the gradient along with the noise — order matters. 3. Hit the de-noise step and let AstroWizard's slider do its thing. I usually start conservative and nudge it up while zoomed into a faint, low-signal region of the frame, not the bright core of the target — that's not where you'll see the problem. 4. Compare before/after at 100% zoom on a few different regions, not just the whole-frame thumbnail. Over-smoothing is way easier to spot zoomed in. 5. Stretch after de-noising, not before. Stretching a still-noisy image just stretches the noise too.
I'm leaning on AstroWizard here because it's what's actually in my workflow — I like that it's free and it walks you through the steps in order instead of leaving you guessing what to do next, which matters a lot when you're trying to get a shot posted the same night instead of disappearing into a processing rabbit hole.
Other AI De-Noising Tools (Worth Knowing, Even If I Haven't Run Them All Myself)
I haven't put every one of these through its paces personally, so take this section as research plus what I've read from other astrophotographers, not a hands-on verdict.
GraXpert (free, standalone) is the same AI de-noising engine AstroWizard uses, but as its own free app if you'd rather run it outside a guided workflow — a good middle ground if you want more control over individual steps.
Siril (free) has its own noise reduction tools built in, including AI-assisted options in recent versions. If you're already stacking in Siril, it's worth trying its de-noise step before exporting elsewhere.
RC-Astro NoiseXTerminator (paid plugin for PixInsight) is probably the tool astrophotographers talk about most when "AI de-noise" comes up. It's a purpose-built astro plugin, not a repurposed general-photo tool, and it has a strong reputation in the community for preserving faint detail while it cleans up noise. It only runs inside PixInsight, though, which is its own paid, steeper-learning-curve program — see my AstroWizard vs. Siril vs. PixInsight breakdown if you're weighing whether that's worth it for you.
Topaz Photo AI (paid, general photography tool) isn't astro-specific, but some astrophotographers use it as a general-purpose de-noise pass. Because it's trained mostly on daytime photography, it can be more prone to inventing detail that isn't really there on very faint, very noisy astro frames — worth being cautious with on deep-sky work specifically.
When AI De-Noising Goes Wrong
AI de-noise tools are good, but they're not magic, and pushing them too hard causes real problems.
Over-smoothing is the single most common mistake — faint real detail like dim spiral arms or wispy nebulosity gets smoothed away right along with the noise. It's why I always check a de-noised frame zoomed in on the faint stuff, not just the bright core.
Star bloat or star smearing can happen when some AI models puff up or distort small stars if you push the strength too far. Worth a zoomed check on a handful of stars across the frame, not just the target itself.
"Hallucinated" detail is when an AI model trained on a lot of images invents texture that looks plausible but isn't actually in your data. This is more of a risk with general-purpose tools like Topaz than astro-specific ones like NoiseXTerminator or GraXpert, which are trained specifically on astronomical noise patterns.
My rule of thumb: if a de-noise pass makes the image look suspiciously clean, back the strength off. A little visible grain in the darkest background is normal and honest; a background that looks airbrushed usually means you've traded real faint signal for a smoother-looking fake.
"A little visible grain in the background is normal. A background that looks airbrushed usually means you traded real signal for a smoother-looking fake."
Gear That Actually Helps This Workflow
This one's mostly a software problem, so I'm not going to pretend you need a cart full of gear to fix noisy images. But there's one real bottleneck worth solving: stacked FITS libraries get big fast, especially if you're keeping your raw subs around so you can re-stack or re-process later (which — do, because you will want to eventually). A fast external SSD makes the whole loop of loading, de-noising, and re-exporting large files way less painful than trying to do it off a phone's internal storage or a slow flash drive.
My Recommendation 🌌
If you're just getting into processing: start free. AstroWizard (or GraXpert standalone) will get you a genuinely good de-noise pass without spending anything, and AstroWizard's guided steps mean you won't be guessing what order to do things in.
If you're already deep into PixInsight for other reasons: NoiseXTerminator is worth adding to your toolkit — it's the plugin most serious astrophotographers reach for specifically because it's trained on astro noise, not daytime photos.
If you just want your shot cleaned up and posted tonight: that's exactly the workflow I run — AstroWizard's guided steps, de-noise before the final stretch, zoom in on the faint stuff before you call it done.
Sources: AstroWizard · GraXpert · Siril · RC-Astro NoiseXTerminator · Topaz Photo AI